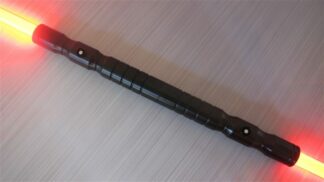
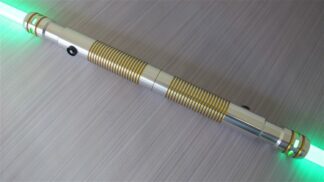
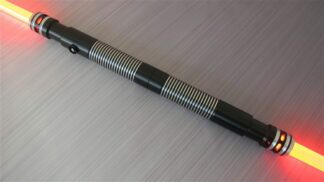
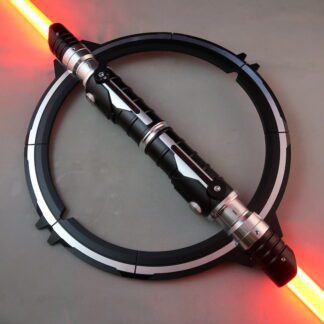
Phantasm Initiate V4

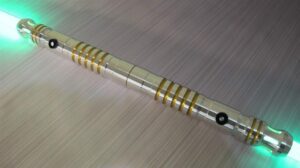
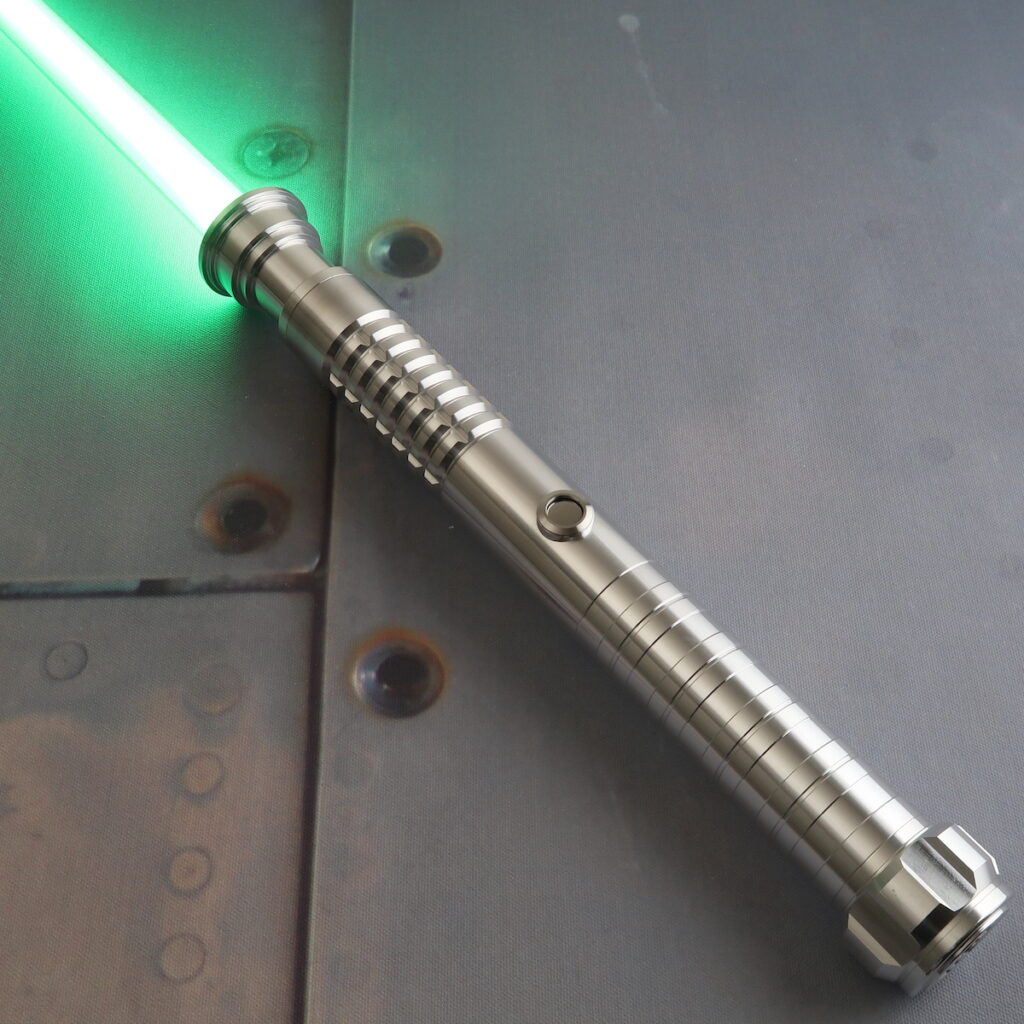
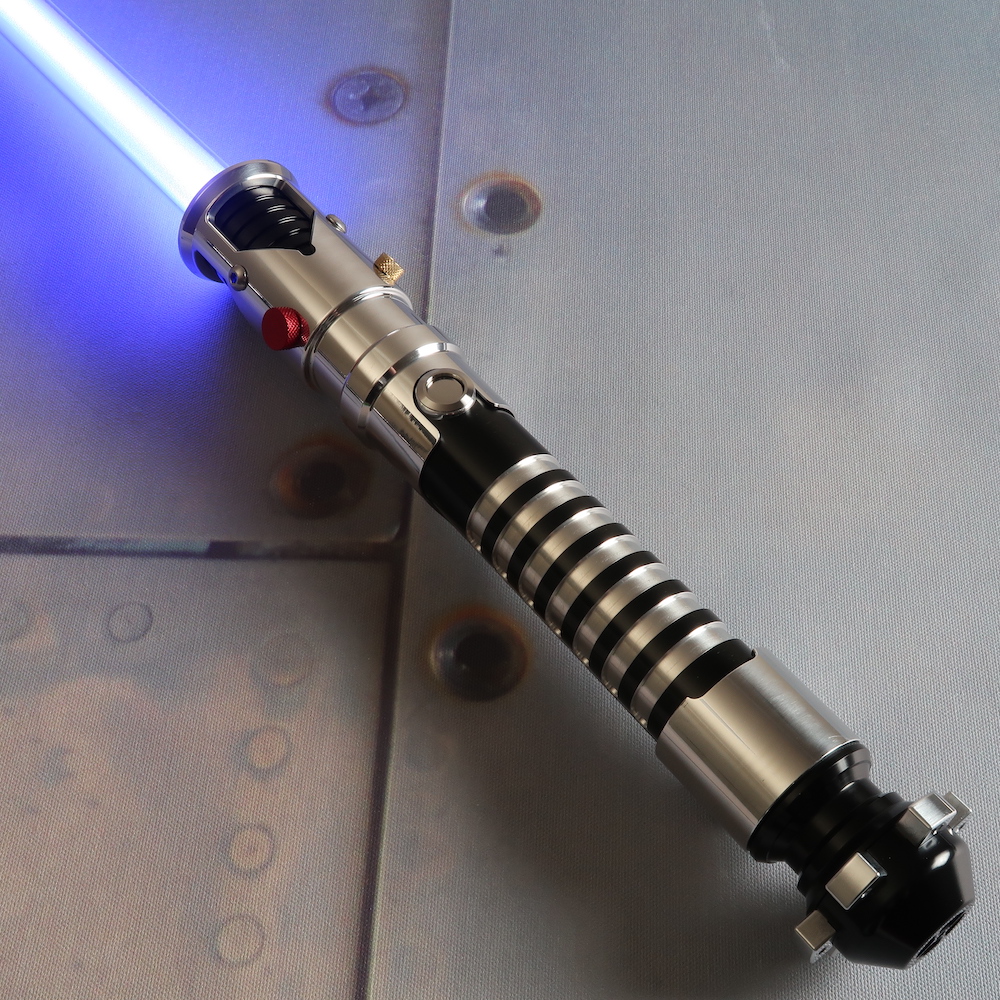
Regular Version with Windows
LE Version with Windows
Regular Version without Windows.jpg
LE Version without Windows
Phantasm Initiate V4 Seperate
Here is a picture with some of our MHS compatible pommels (from left to right: Warglaive, Raven Normal, Bellicose Short Groove, Guardian, Catalyst, Dark Catalyst, Scorpion, Raven SS, Consular, Dark Warglaive pommels)

Phantasm Initiate V4

$30.00 OFF! $150.00 $ 120.00

CUSTOMIZATION BREAKDOWN

Choose Your Configuration

NO SOUND (Stunt Saber)

Choose the color of your blade!

Guardian Blue

Choose the color of your blade!


Blazing Red, Consular Green, Guardian Blue, Fire Orange, and Adegan Silver are all made with single diode High Powered LEDs.

Violet Amethyst, Sun Rider's Destiny, Arctic Blue, Bane's Heart, Blue Violet Amethyst, Pyrestone Orange, and Sentinel Yellow are all made with multicolor RGB LEDs and combining multiple diodes to create the Blade Color.

Tri Blazing Red, Tri Consular Green, Tri Guardian Blue, Tri Fire Orange, Tri Arctic Blue and Tri Adegan Silver are all made using Tri Cree LEDs with all three diodes wired together. [Not compatible with Flash on Clash]

To use color discs you remove the blade, drop a disc down the blade socket, then replace the blade. These only work properly with the Adegan Silver blade color. Colors obtained using color discs create a blade that is significantly dimmer than if you just ordered that color blade standalone (for example Guardian Blue is much brighter than using a blue color disc).

Flash on Clash Hilt 1

No Flash
Please be sure that you select a color that is compatible with your Blade LED color, otherwise this will default to Silver (the best and most visible Flash on Clash color for most Blade colors). The Default Flash on Clash color for Adegan Silver is Arctic Blue.

***PLEASE NOTE: Flash on Clash is not possible with Tri Cree LEDs. If you opt for Flash on Clash then your saber CANNOT be made with a Tri Cree LED. You can only have one or the other. If you select both the the cost for the Tri Cree LED will be refunded and your saber will be made with Flash on Clash***


Check out our post on Flash on Clash here! (Link will open in a new tab)

Choose your 2nd color

Guardian Blue
Choose the color of your blade!

Blazing Red, Consular Green, Guardian Blue, Fire Orange, and Adegan Silver are all made with single diode High Powered LEDs.

Violet Amethyst, Sun Rider's Destiny, Arctic Blue, Bane's Heart, Blue Violet Amethyst, Pyrestone Orange, and Sentinel Yellow are all made with multicolor RGB LEDs and combining multiple diodes to create the Blade Color.

Tri Blazing Red, Tri Consular Green, Tri Guardian Blue, Tri Fire Orange, Tri Arctic Blue and Tri Adegan Silver are all made using Tri Cree LEDs with all three diodes wired together. [Not compatible with Flash on Clash]

To use color discs you remove the blade, drop a disc down the blade socket, then replace the blade. These only work properly with the Adegan Silver blade color. Colors obtained using color discs create a blade that is significantly dimmer than if you just ordered that color blade standalone (for example Guardian Blue is much brighter than using a blue color disc).

Flash on Clash Blade 2

No Flash
Please be sure that you select a color that is compatible with your Blade LED color, otherwise this will default to Silver (the best and most visible Flash on Clash color for most Blade colors). The Default Flash on Clash color for Adegan Silver is Arctic Blue.

***PLEASE NOTE: Flash on Clash is not possible with Tri Cree LEDs. If you opt for Flash on Clash then your saber CANNOT be made with a Tri Cree LED. You can only have one or the other. If you select both the the cost for the Tri Cree LED will be refunded and your saber will be made with Flash on Clash***


Check out our post on Flash on Clash here! (Link will open in a new tab)

Battery Configuration

Li-Ion Staff Setup (2x 18650 Batteries & 2x Chargers Included)
***The VC2 Charger is HIGHLY recommended for all Li-Ion setups. This is by far the superior charger for Li-Ion battery care and maintenance.***

Standard Setup is a setup that uses regular AAA batteries to power your saber. (4xAAA batteries for all colors). You can use regular Alkaline batteries or rechargeable NiMh batteries (not provided).

Our Li-Ion battery Setups are the superior battery pack configurations. A Li-Ion battery configuration is required for all sabers with sound. (Your saber only comes with sound if it says WITH SOUND in the title of the setup name)

Recharge Port

No Recharge Port


Check out our FAQ and video on Recharge Ports here! (Link will open in a new tab)

We offer three different Recharge Port Charger options depending on your battery setup. If you plan on opting out of a charger to use one you already own, please read our FAQ to ensure that your charger is compatible and avoid damaging your electronics.

Recharge Ports are not compatible with our Basic Soundboard.

Blade Option

UltraEdge Midgrade
Select what type of blade you want to come with your UltraSaber.

> Mid-Grade
Mid-Grade blades are an excellent all around choice. They are lightweight and allow the true color of the LED through at maximum brightness. These blades are durable enough for light sparring, but are not as thick as our Heavy Grade blades and are therefore not recommended for full contact/ heavy dueling.

> UltraEdge
UltraEdge blades are available in the above Mid & Heavy grades, and are created from a white polycarbonate tube providing a thick, bright blade. The white polycarbonate creates a FULLER blade look but isn't as bright as non-Ultraedge blades.

> Heavy Grade & Ultra Edge Heavy Grade
Our Heavy Grade blades weigh literally twice as much as the Mid-Grade blades, and they do trade off a bit of brightness in exchange for their brutal strength. These blades are recommended blade for those who intend on full contact dueling or sparring against wooden Bokken or similar weaponry.

For more detailed information, check out our SaberForum post that explains the difference between each of our available lightsaber blade types here. (Link will open in a new tab)

Blade Size

Initiate 24" Blade
Select the length of your lightsaber's blade.

Hilt 1 Model

Regular Version

Hilt 1 Windows

No Windows in Emitter
Our v4 sabers come in two different versions: with windows in the emitter and without windows in the emitter. Please select the version of your choice here. You can see the difference in these two version in the pictures below in the item description.

If a version is not listed as an option here then we are out of stock on it. Please email us for more info on availability.

Hilt 2 Model

Regular Version

Hilt 2 Windows

No Windows in Emitter
Our v4 sabers come in two different versions: with windows in the emitter and without windows in the emitter. Please select the version of your choice here. You can see the difference in these two version in the pictures below in the item description.

If a version is not listed as an option here then we are out of stock on it. Please email us for more info on availability.

Choose Blade Tip Type

Round Tip
Round Tips look round and pointed tips look pointed. There is absolutely no other difference.

There is a surcharge for pointed tips because we do not stock these and would have to custom make the blade for you. They are not superior in any way. It is just a preference if you want your tip to be round or pointed.

99% of Ultrasaber blades are made with round tips.

Blade Retention Screw Wrench

No Thanks
The Blade Retention Screw Wrench is just the small allen wrench required to remove the blade. This wrench is NOT required to hold the blade in place. That screw is provided standard with every Ultrasaber.

You can also purchase these separately from any hardware store, or you may already own a set of these. Purchasing this one guarantees that you will get the correct size wrench for the screw in your Ultrasaber. Using the wrong size wrench can strip your retention screw.

All Ultrasaber retention screws require Standard size hex wrenches, DO NOT USE METRIC SIZE WRENCHES, you will strip the screw.

Include Blade Plug

No Thanks
Blade Plugs are designed to be inserted in your saber when the blade is removed to protect your LEDs. They give the hilt a cool look when the saber is ignited, and prevent you from shining a high powered LED directly into yours or someone else's eyes.

Select an option above to see illuminated examples of each blade plug.

Include Day Blade

No Thanks
Day blades are a fantastic solution to keep your saber looking perfect during long days of brightly lit conventions, outdoor events, intense studio lighting, or times when you don't have your saber powered on.

Day Blades are 36" Heavy Grade blades, with a 1" diameter.

Please Note: A Day Blade's colored Polycarbonate will affect the appearance of the color of your saber's LED when it is ignited. Please make sure to select a Day Blade blade that best matches your saber's blade color!

Include Saber Stand

No Thanks
Very basic assembly is required for stands. Any damage from assembling incorrectly is not covered under warranty.

***Sabers in pictures are NOT included with the stand, and are only shown for reference***

Include Second Blade Plug

No Thanks
Blade Plugs are designed to be installed in your saber when the blade is removed.

They give the hilt a cool look with the blade removed (see below) and help to prevent shining a high powered LED directly into yours or someone else's eyes.

Blade Plugs (hold ctrl and click link to open in new window)

Include Second Day Blade

No Thanks
Day blades are a fantastic solution to keep your saber looking perfect during long days of brightly lit conventions, outdoor events, intense studio lighting, or times when you don't have your saber powered on.

Day Blades are 36" Heavy Grade blades, with a 1" diameter.

Please Note: A Day Blade's colored Polycarbonate will affect the appearance of the color of your saber's LED when it is ignited. Please make sure to select a Day Blade blade that best matches your saber's blade color!

Include Second Saber Stand

No Thanks
Very basic assembly is required for stands. Any damage from assembling incorrectly is not covered under warranty.

***Two Piece Saber Stand is pictured below. Saber in picture is NOT included and only shown for reference***

Coupler

[NO SOUND] Standard Coupler

Hilt 1 Pommel

Regular Solid Pommel (No Sound) [Recommended]

Hilt 2 Pommel

Regular Solid Pommel (No Sound) [Recommended]

Hilt 1 Sound

Obsidian Lite Sound with Chassis! [40% Off Obsidian Sound]

Pick the type of sound install you want for your saber.


Features of the UltraProffie Soundboard:


Check out our FAQ for a description of the differences between UltraProffie Lite and UltraProffie Zero.

The UltraProffie board features a simple to use, single button and gesture-controlled on-board settings menu that allows you to adjust blade brightness, color with select options, sound with select options, sensitivity, volume, and more straight from the saber.
-Up to 25 preloaded sound + blade style presets.
-Smooth swing built in to every UltraProffie Soundboard.
-Tip drag, all-new ignition & deactivation effects, new lockup, blaster block, wall melt, blaster mode, force lightning and so so so much more- all baked right in when you get it with a Neopixel Blade.
-Advanced sensitivity controls for every single motion your saber is capable of.
-Switch your Ultrasaber into Stealth-Mode for ~1/3rd power output, to extend your saber’s battery life.
-Upgraded from a 2watt to a 3Watt speaker.
-Built in USB recharge port on each soundboard.
-Auto-power-off at timeout and low battery.
-So much more.


Visit the UltraProffie Launcher here for saber controls and open source documentation (Requires Google Chrome).
View and download the UltraProffie Lite Guide here.
View and download the UltraProffie Zero Guide here.


Features of the NEW Obsidian Soundboard with Chassis are:


-Built on chassis, ⏀1.3”, 4” long
-Powered by a single 3.7V, 18650 Li-Ion rechargeable battery
-Built-in battery holder and electrical protection
-Built-in audio amplifier and speaker
-Drives 2 LEDs and a 127-pixel string blade, simultaneously
-Up to 10 fonts, up to 25 sounds per font
-Up to 6 : 40 minutes audio memory
-Auto-power-off at timeout and low battery

Click here for technical specs for NEW Obsidian Soundboard.

Click here for users guide for NEW Obsidian Soundboard.

Hilt 1 Switch Type

Guarded Switch
You can also opt in include the normal Guarded switch, an illuminated or non-illuminated AV Switch switch here. These AV switches are just for cosmetic purposes (they make your saber look cool), they do not serve for any additional functionality and are not required for any additional functionality.


***Non Illuminated AV Switch on LEFT. Guarded Switch on RIGHT. Sabers in picture are NOT included and only shown for reference. Guarded Switches are BLACK on Sabers with Sound. Guarded Switches are Silver, Red, or Blue on Sabers WITHOUT Sound.***

Hilt 2 Sound

Obsidian Lite Sound with Chassis! [40% Off Obsidian Sound]

Pick the type of sound install you want for your saber.


Features of the UltraProffie Soundboard:


Check out our FAQ for a description of the differences between UltraProffie Lite and UltraProffie Zero.

The UltraProffie board features a simple to use, single button and gesture-controlled on-board settings menu that allows you to adjust blade brightness, color with select options, sound with select options, sensitivity, volume, and more straight from the saber.
-Up to 25 preloaded sound + blade style presets.
-Smooth swing built in to every UltraProffie Soundboard.
-Tip drag, all-new ignition & deactivation effects, new lockup, blaster block, wall melt, blaster mode, force lightning and so so so much more- all baked right in when you get it with a Neopixel Blade.
-Advanced sensitivity controls for every single motion your saber is capable of.
-Switch your Ultrasaber into Stealth-Mode for ~1/3rd power output, to extend your saber’s battery life.
-Upgraded from a 2watt to a 3Watt speaker.
-Built in USB recharge port on each soundboard.
-Auto-power-off at timeout and low battery.
-So much more.


Visit the UltraProffie Launcher here for saber controls and open source documentation (Requires Google Chrome).
View and download the UltraProffie Lite Guide here.
View and download the UltraProffie Zero Guide here.


Features of the NEW Obsidian Soundboard with Chassis are:


-Built on chassis, ⏀1.3”, 4” long
-Powered by a single 3.7V, 18650 Li-Ion rechargeable battery
-Built-in battery holder and electrical protection
-Built-in audio amplifier and speaker
-Drives 2 LEDs and a 127-pixel string blade, simultaneously
-Up to 10 fonts, up to 25 sounds per font
-Up to 6 : 40 minutes audio memory
-Auto-power-off at timeout and low battery

Click here for technical specs for NEW Obsidian Soundboard.

Click here for users guide for NEW Obsidian Soundboard.

Hilt 2 Switch Type

Guarded Switch
You can also opt in include the normal Guarded switch, an illuminated or non-illuminated AV Switch switch here. These AV switches are just for cosmetic purposes (they make your saber look cool), they do not serve for any additional functionality and are not required for any additional functionality.


***Non Illuminated AV Switch on LEFT. Guarded Switch on RIGHT. Sabers in picture are NOT included and only shown for reference. Guarded Switches are BLACK on Sabers with Sound. Guarded Switches are Silver, Red, or Blue on Sabers WITHOUT Sound.***

Include MINI USB Cable

No Thanks
A MINI USB cable is needed in order to interface your saber's Obsidian Soundboard or Emerald Driver with the Obsidian Launcher on your computer when changing your installed soundfonts or blade color.

You can download the Obsidian Launcher here.

[Note: This cable is NOT used for any charging purposes]

Include MICRO USB Cable

No Thanks
A MICRO USB cable is needed in order to interface your saber's Diamond Controller with the Ultrasabers Launcher on your computer when changing your installed fonts, effects, and gestures.

You can download the Ultrasabers Launcher for the Diamond Controller here.

[Note: This cable is NOT used for any charging purposes]

Include DevPort Module

No Thanks
The DevPort can only be used with UltraProffie soundboards. It has no compatibility with Obsidian, Emerald, or Diamond boards. The DevPort is required to connect any UltraProffie board to www.ultraproffie.com (requires Google Chrome) or Arduino via USB.

Any use of the DevPort with the UltraProffie soundboard is not covered under warranty. This tool allows you to makes changes to the actual coding of the soundboard and is for advanced users only.

Include Belt Clip

No Thanks
A belt clip wheel is the knob on a lightsaber that allows you to attach the lightsaber to a belt clip and wear it on your belt.

A clip is the clip that you wear on your belt that allows you to hang your lightsabers from a belt clip wheel for costuming or to just carry your saber in general.  This is typically done with the blade removed.  The blades are removable on ALL Ultrasabers.

Not all Ultra Sabers come standard with a belt clip wheel. All Prophecy models, all Shock Models, The Bane, The Bellicose, The Overlord, The Guardian, The Graflex SE & CE, and The Consular are just a few of the sabers that come standard with a belt clip wheel and one does not have to be added or purchased.


You can purchase a belt clip wheel separately from here.
(Link will open in a new tab)

You can purchase a belt clip clip separately from here.
(Link will open in a new tab)

Install Belt Clip Wheel

No Thanks
A belt clip wheel is the knob on a lightsaber that allows you to attach the lightsaber to a covertec clip and wear it on your belt.

If your UltraSaber doesn't come standard with a belt clip wheel, you can have one added before it ships. In the comments field of your order, specify where on the hilt and what color covertec wheel (silver, black, or gold) and we'll take care of that for you before the saber ships.

Please keep instruction to TWO things ONLY in the comments field of the order at checkout:

1: Left, Right, or Rear (activation switch representing the front) and
2. Near Pommel or Above Switch.

Those are the only two pieces of information we need for belt clip wheel location requests. Please do not use degrees or clock rotations or include image links for belt clip wheel location requests. A proper belt clip wheel location request would be "Left Side Near Pommel" or "Rear Side Above Switch" or "Rear Side Near Pommel" etc. You can also not put anything in the comments field and we will select an excellent default location for your belt clip wheel install.

Include Second Belt Clip

No Thanks
A belt clip wheel is the knob on a lightsaber that allows you to attach the lightsaber to a covertec clip and wear it on your belt.

A belt clip is the clip that you wear on your belt that allows you to hang your lightsabers from a belt clip wheel for costuming or to just carry your saber in general.  This is typically done with the blade removed.  The blades are removable on ALL Ultrasabers.

Not all Ultra Sabers come standard with a belt clip wheel. All Prophecy models, all Shock Models, The Bane, The Bellicose, The Overlord, The Guardian, The Graflex SE & CE, and The Consular are just a few of the sabers that come standard with a covertec wheel and one does not have to be added or purchased.


You can purchase a belt clip wheel separately from here.
(Link will open in a new tab)

You can purchase a belt clip separately from here.
(Link will open in a new tab)

Install Belt Clip Wheel Hilt 2

No Thanks
If you would like to specify a location please let us know TWO things ONLY in the comments field of the order at checkout.

1: Left, Right, or Rear (activation switch representing the front) and
2. Near Pommel or Above Switch.

Those are the only two pieces of information we need for belt clip wheel location requests. Please do not use degrees or clock rotations or include image links for belt clip wheel location requests. A proper belt clip wheel location request would be "Left Side Near Pommel" or "Rear Side Above Switch" or "Rear Side Near Pommel" etc. You can also not put anything in the comments field and we will select an excellent default location for your belt clip wheel install.


A covertec wheel is the knob on a lightsaber that allows you to attach the lightsaber to a covertec clip and wear it on your belt.

A covertec clip is the clip that you wear on your belt that allows you to hang your lightsabers from a covertec wheel for costuming or to just carry your saber in general.  This is typically done with the blade removed.  The blades are removable on ALL Ultrasabers.

Not all Ultra Sabers come standard with a covertec wheel. All Prophecy models, all Shock Models, The Bane, The Bellicose, The Overlord, The Guardian, The Graflex SE & CE, and The Consular all come standard with a covertec wheel and one does not have to be added or purchased.


If your Ultra Saber doesn't come standard with a covertec wheel, you can have one added before it ships here and in the comments field of your order specify where on the hilt and what color covertec wheel (silver, black, or gold) and we'll take care of that for you before the saber ships.

You can purchase a covertec wheel separately from here.
(Link will open in a new tab)

You can purchase a covertec clip separately from here.
(Link will open in a new tab)

Phantasm Initiate V4

Availability: LEAD TIME - Allow 1 to 3 Business Days for Fabrication

Questions? Call 832-596-9003 or Click Here for How to Buy

SPECIFICATIONS

  • All Aircraft Grade Aluminum Construction
  • Length (Put Together With A Standard MHS Coupler): 18.75”
  • Length (Individually): 9.875"
  • Width: 1.45”
  • Removable Pommels (MHS Compatible)
  • Polycarbonate Blades
  • CREE XP-E2 or LED Engin High Powered LED

Description

What do you get when you combine two Initiate V4 Lightsabers together? A Phantasm Initiate V4.

This is the new and greatly improved Phantasm Initiate. This is not just a Phantasm with short blades. The hilt as well as the blades are much shorter than the full size Phantasm, making this a true Initiate staff. It also is sound capable!

This staff is vastly superior to it’s predecessor in many ways. First and foremost, it’s made from aircraft T6 aluminum, which greatly contributes to its durability and great looks. The standard coupler that holds the two together is actually hidden inside the sabers and the ultrasabers combine to make one flush double sided saber. The pommels that come with the staff are threaded for easy battery access. They are also MHS compatible which means you have a vast selection of unique and premium pommels to use with your saber when dual wielding.

One of the best features of the Ultrasaber’s Phantasm Initiate v4 is that this lightsaber is sound capable. In order to hear the sound when the sabers are connected in staff form, you must select a coupler with vents. And in order to hear the sound when dual wielding the lightsabers you must select a pommel that is vented (not the solid version).

The Phantasm Initiate V4 can be used as a staff or you can separate it into two individual sabers. The Phantasm Initiate V4 comes with a coupler to make the staff and two pommels to make individual sabers.

The Phantasm Initiate comes standard with two 24 inch Ultra blades, these can be upgraded to 32″ or 36″.

REVIEWS